How to create your first Ubuntu 18.10 x64 Digital Ocean droplet in Frankfurt for $5/month from the DigitalOcean Control Panel
In this minipost you will be guided to create your first Digital Ocean droplet with Ubuntu 18.10 x64 in Frankfurt region (or a region of your choice) from the DigitalOcean Control Panel, step by step with screenshots and with the minimum configuration required in order to access it and get started.
The first thing to do is to navigate to Digital Ocean website (affiliate link) to signup and create your personal account.

Create project
Having finished the registration process and having a verified account created, you should now proceed with the creation of your first project. By DigitalOcean projects we mean a way to organise our Droplets under a common cause. Projects are not deployed somewhere, are used to organise the Droplets we use for a specific project.
Therefore, navigate to DigitalOcean Control Panel, click on the new project button on top of the left sidebar and fill in the following form with your project details.

For the sake of a good example, I have filled the new project form with the above details. Moving forward and by pressing the Create Project button, you will be navigated on the next form to start adding resources that might be needed in the project. Such resources could be Digital Ocean Spaces, Load Balancers, domains or floating IPs.

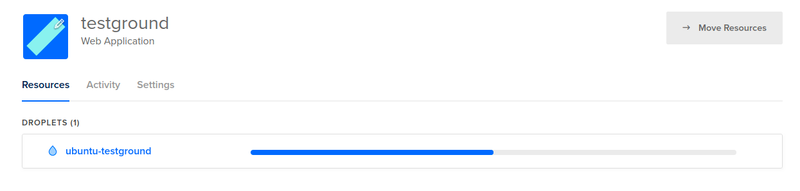
Just press Skip for now and you will be navigated to your newly created project space, like in the following screenshot.

At this point you have created your project space testground and you are ready to start creating droplets that we will be utilised in this project.
Create Droplet
In order to start with our first Droplet, press the Get started with a droplet blue button. By doing this, you will be navigated to the Droplet configuration form where you can choose the specs of your Droplet you are about to create.
The first part is to choose the distribution image that you want to be used in your Droplet, as long as the size of the Droplet. For this example, I have chosen Ubuntu 16.04 x64 distribution and the cheapest size that is available for $5 / month. Both of the choices have been selected on the following screenshot.

At this point Digital Ocean offers 1GB CPU with 25GB SSD disk and 1T transfer for a monthly fee of just $5.
The next part that I will configure in this post is the region of the datacenter that the Droplet will be deployed. Feel free to choose the appropriate region for your deployment. For this post, region Frankfurt has been selected.

Moving forward to the final configuration steps, a more friendly Droplet name could be a nice idea. Therefore, on the hostname input field delete the auto generated name: ubuntu-s-1vcpu-1gb-fra1-01 and replace it with a more friendly name. In this minipost, I will use the ubuntu-testground hostname. This hostname will be used for other miniposts in the near future, that require a simple Droplet setup.

If you are familiar with SSH Keys, press the new SSH Key button and add the SSH Key of your development machine, in order to gain SSH access to the Droplet upon creation. For this miniport I will not configure the SSH keys, I will do it in an upcoming minipost.
Go ahead and create your first Droplet by pressing the green Create button. You will then be redirected to the testground space that will show that your newly created Droplet is in progress.
Couple of seconds later, you will receive an email to your account with the details of your newly created Droplet and the UI will be updated with the details of ubuntu-testground droplet like the following screenshot

Your Droplet is now created and ready to get accessed at the IP that is displayed next to the Droplet's name.
Additional information:
- Sign up to Digital Ocean with our affiliate link
- How to Create a Droplet from the DigitalOcean Control Panel
- How to SSH to your newly created Digital Ocean Droplet